Use the planner
How to use the StockAlpha shoot planner
By StockAlpha · Updated · 7 min read
Build a plan around the equipment, time and places you can actually use. This walkthrough follows a phone-and-kitchen example through the working StockAlpha planner: answer three short steps, choose a brief, add notes, then save and download your plan.
1. Choose your equipment and available time
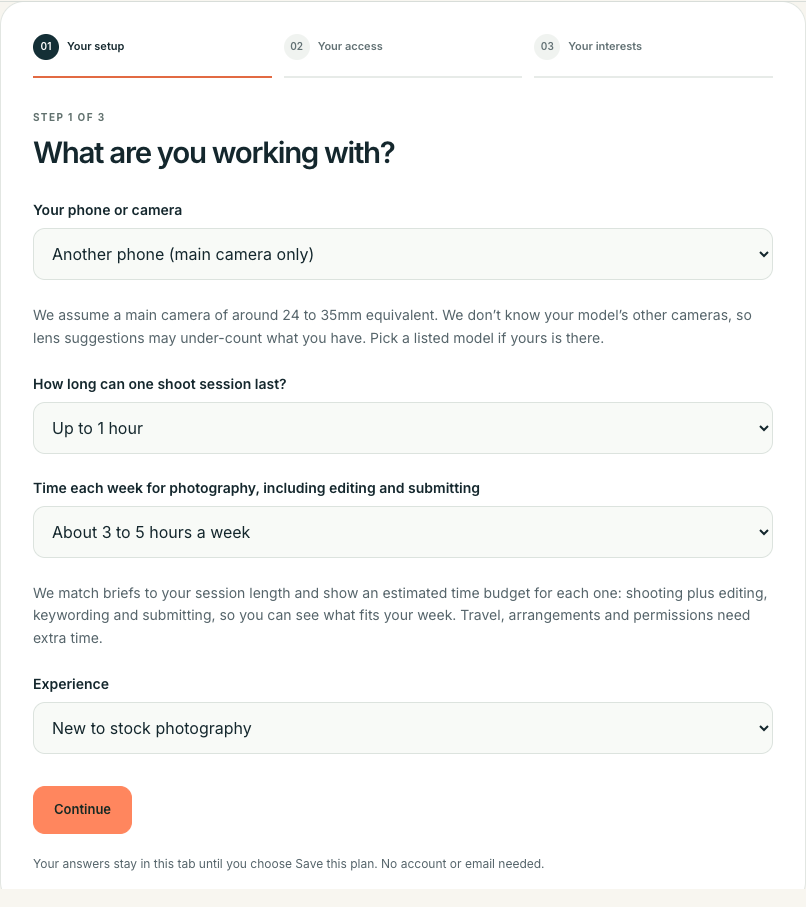
Open the personal planner, choose ‘Home and arranged shoots’, then start with ‘Your setup’. The separate ‘Destination and opportunities’ route adds a place, date, transport and current-versus-long-term preference before these equipment questions. Choose your phone or camera, the longest photographing session you can arrange, your weekly time for the whole workflow and your experience. Camera users can list the lenses and lighting they have; phone entries describe the available camera reach.
Our example uses ‘Another phone (main camera only)’, a session of up to one hour, about three to five hours a week and ‘New to stock photography’. Choose the answers that describe your own situation. The session limit and weekly allowance have different jobs: the first bounds a shoot, while the second includes editing, keywording and submission work.
Select Continue to move to your access. Your answers remain in this tab until you choose to save a personal plan later.
2. Select places and participants you can arrange
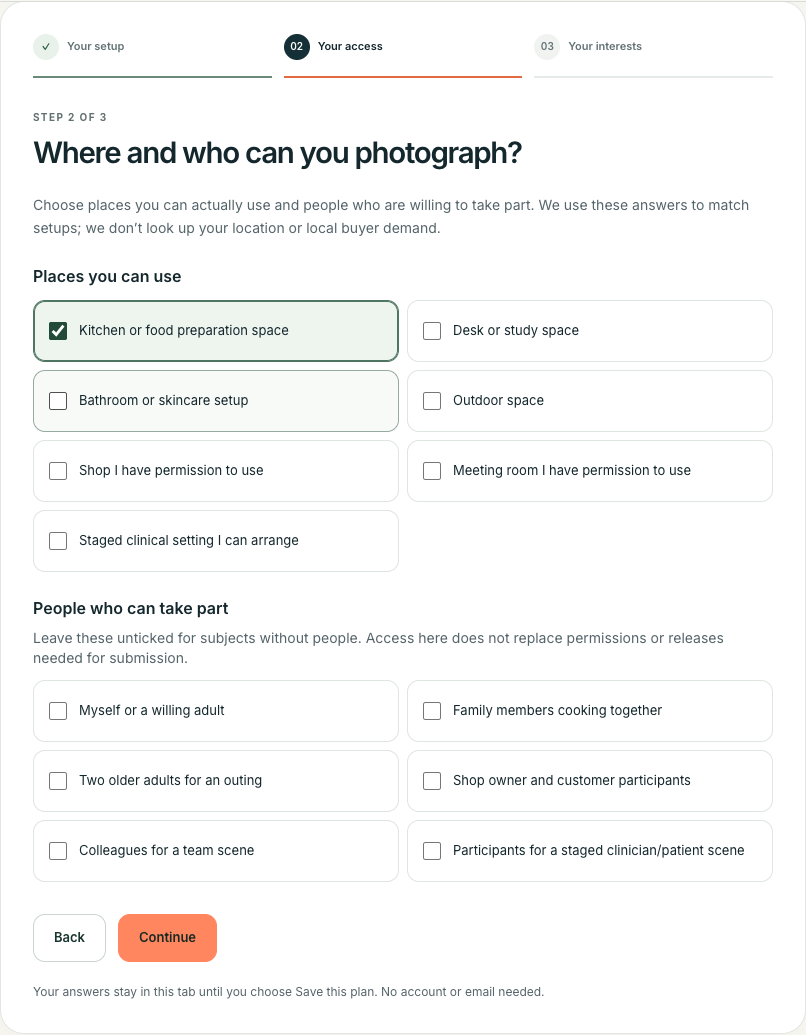
In ‘Your access’, tick the settings you can use and any people who are willing to take part. Our example selects ‘Kitchen or food preparation space’ and leaves participants unticked. That gives the planner a practical basis for subjects without people.
This home/arranged-shoot route uses these choices to match catalogue setups; it does not look up your location. Access choices also do not replace the permissions or releases a submission may need. Select Continue when the answers are realistic for the session you have planned.
3. Add interests and show your shoot ideas
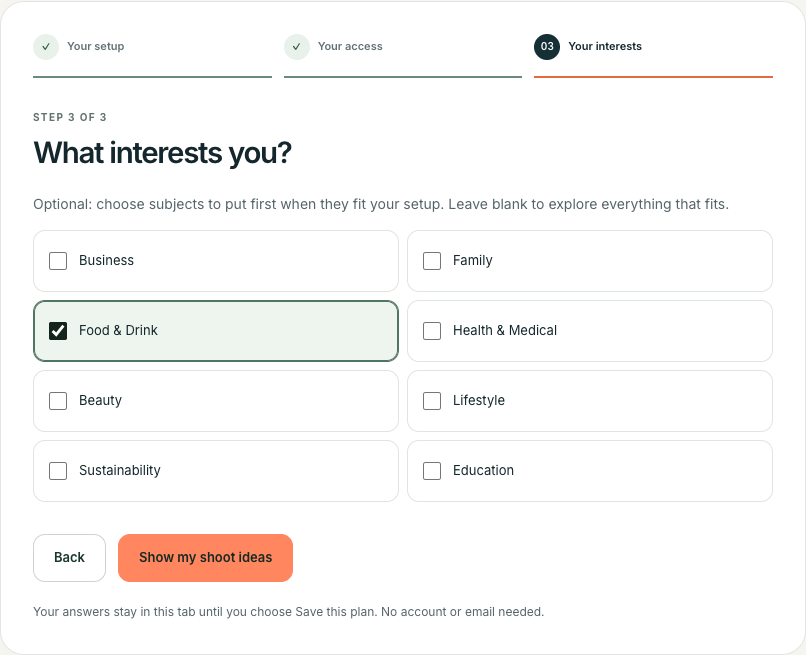
Interests are optional. They put relevant subjects first when those subjects also fit your setup. Our example selects ‘Food & Drink’, then ‘Show my shoot ideas’. You can leave interests blank to explore everything that fits.
The results explain why each brief matches and show time allowances for shooting and editing. Compare those reasons with your actual circumstances. The catalogue is a small selection of setups, so a missing match may mean it does not cover your situation yet.
If there are no matches, review your answers or browse the full brief catalogue. Change an answer when your real arrangements change. A preferred topic does not override the equipment, access or time needed for a setup.
4. Choose one brief and review the plan
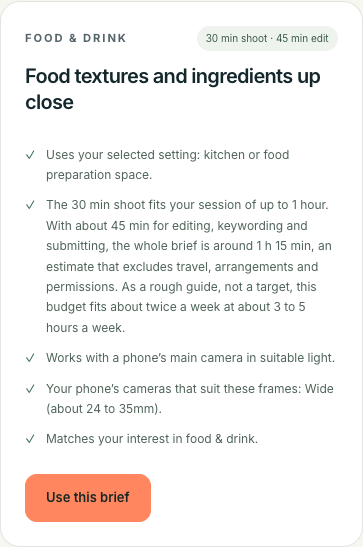
Our example chooses ‘Food textures and ingredients up close’. Select ‘Use this brief’ on a result you can put into practice. The planner opens preparation steps, suggested frames, keyword starters and the linked research. Read the sources to see what supports the direction and which parts are planning suggestions.
Use the preparation steps to identify what needs arranging before the session. Review the shot list and choose compositions that serve different purposes. The keyword starters are prompts to check against the photographs you eventually make.
A matching brief describes a feasible starting setup. It does not measure your likely sales or guarantee acceptance. Allow extra time for travel, arrangements and permissions beyond the displayed production budget.
5. Add notes, save in this browser and download a copy
Use ‘Your planning notes’ for practical decisions. For the example, we add: ‘Use a clear table near a window. Check the first frame for labels and reflections.’ This is a demonstration note for planning a future session.
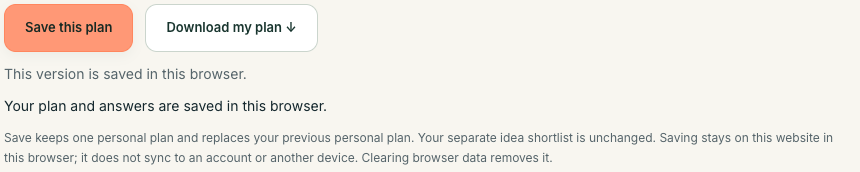
Select ‘Save this plan’ and check the confirmation. Saving keeps one personal plan on this website in the current browser and replaces the previous personal plan. It retains the answers, chosen brief and notes when you return in that browser. Clearing browser data removes it, and automatic account or device sync is not available.
Select ‘Download my plan’ to keep a text copy containing your setup, preparation, frames, notes and sources. Use the download if saving is unavailable, or when you want a copy outside the browser. In this walkthrough, the saved example was reloaded and its download was checked.
6. Use the plan, then review the finished photographs
Before the session, resolve the access and preparation tasks in your notes. During the shoot, inspect the first frames while the setup is available and adjust the shot list when the light or subject calls for it.
Afterwards, review the selected files and write metadata from the final crops. Keep a short note about what worked and what you would change. Use the keywording worksheet and submission checklist to carry that review into the next part of the workflow.
The planning tools remain available without joining the waitlist. Join when you want launch news about the planned StockAlpha programme of practical training and planning tools.
Sources and editorial approach
- StockAlpha personal shoot planner ↗
The walkthrough is based on the working product, checked 31 October 2026. Screenshots show a demonstration setup. Browser saving, reloading and a text-plan download were checked; this is a planning walkthrough rather than a completed photo shoot.
These field notes combine linked agency guidance with StockAlpha’s planning suggestions. Read our evidence and method for how we distinguish sources from interpretation.